
Loudness is one of those things that most beginning podcasters struggle with. Despite hours of editing and volume adjustment, the episode still sounds quiet once it’s uploaded to the RSS feed. There’s plenty of free (and paid (and wildly overpriced)) programs that will “fix it for you”, but mixing for a target loudness is a skill that will make your show sound a whole lot better.
Basic Required Vocabulary
Let’s start with some requisite vocabulary. I’m trying to keep this as non-technical as possible and explain the technical bits as they come up, but we are ultimately dealing with a lot of similar looking numbers, so some jargon is going to seep in. To help guide you through this how-to, here are some basic definitions.
dBFS: Decibels Relative to Full Scale or “How loud your device tells your speaker to be”
Your waveform consists of many thousands of points which contain volume information that is sent to your speaker. 0dbFS means “The absolute loudest this speaker’s hardware will allow”. The overwhelming majority of audio (and what should be all of it for podcasting) is read as negative numbers because the volume is less than 0dBFS–at or above that and you’ll get clipping, which is that nasty distortion that happens when your audio is too loud.
RMS: Root Mean Square or “What that big green bar shows you when it moves”
Since a waveform’s data is processed extremely fast, digital audio levels are typically measured using RMS, which is the average volume your speaker is told to produce over a given amount of time (typically about 300 milliseconds). It can also be applied to the whole file (labeled as RMS-I for “Integrated”) for a single statistic.
LUFS: Loudness Units Full Scale or “How loud does it sound?”
While RMS is great for “mechanical” measurements, it’s got one major weak point: Ears. Humans hear certain frequencies (measured using kilohertz, kHz) as louder than others even if they have the same decibel level. Really low frequencies need to be really loud in order to sound as loud as something in the 1-2kHz range. Think of LUFS as RMS but corrected for how you actually hear.
Regulation Guidelines
LUFS are regulated for broadcast media in most of the world, typically down at -24 or -23LUFS; TV and radio should sound about the same volume even if you switch stations–and importantly, advertisements won’t blast your ears out to make sure you hear them. On the internet however, standards compete: While some platforms maintain a broadcast style loudness near -24 LUFS, you’ll see guidelines all the way up into the negative single digits–that’s usually for music production though and is advice given by individual producers, not streaming platforms.
For podcasting, our golden number is -16LUFS-Integrated (LUFS-I), meaning the whole file should average -16LUFS. This is the guideline set by Apple Podcasts years ago and most podcatchers have followed suit; there’s one or two that say -14.
These internet guidelines originate from the music industry, which likes to get loud. The idea was that if you uploaded something REALLY LOUD at say, -3LUFS-I, the platform would automatically reduce the volume of the file to -16LUFS-I. Sounds great, we’re not getting our ears blown out!
Podcasting tends to have the opposite problem though: Files are too quiet and the platform doesn’t boost them up–meaning that episode you’ve been working on for months just still sounds quiet. This can be a problem for listeners who are willing to ride the volume knob, because if your file is mostly really quiet but has one or two loud parts like this?
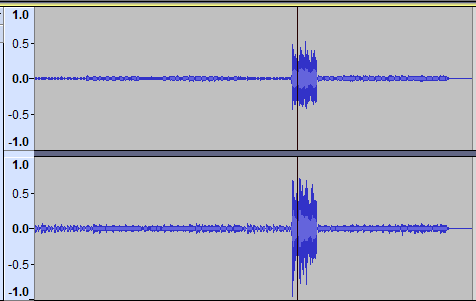
They’re going to spend most of the episode with the volume cranked up to maximum only to be hit with an ear shattering noise when you have the one really loud sequence (which always seems to be an explosion for some reason). That can mean immediate pain for your listener, possible hearing damage depending on their speakers, and possibly injury–especially if they’re driving and that sudden volume change causes them to swerve.
Measuring LUFS for an Individual Audio File
My top recommendations are Youlean Loudness Meter (free basic version and paid pro version) and Reaper (unlimited free trial, but I encourage purchasing it).
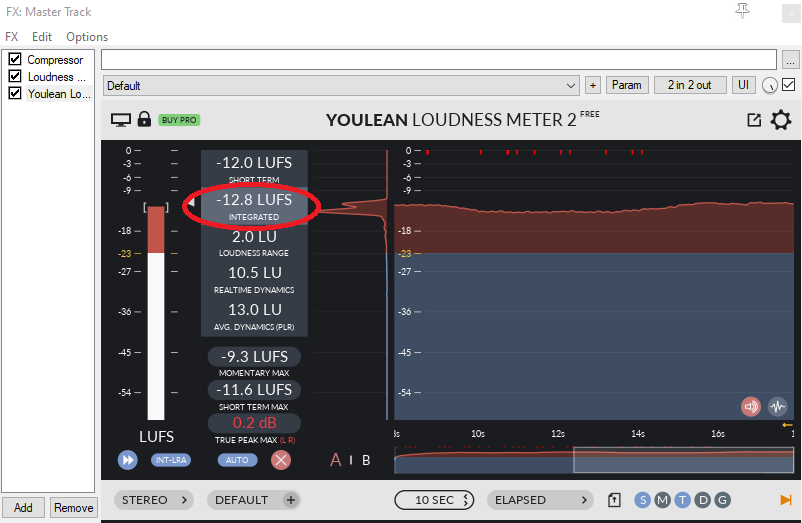
Youlean Loudness Meter is a plugin that you put at the end of your master track’s FX chain, and it’ll give you a readout of all the loudness stats in real time as your file plays. You need to pay to analyze files quickly, so you’ll need to let the episode play out for a proper LUFS-I number.
Reaper has a number of built-in metering tools (along with numerous community created ones). Personally, I use the JS plugin Loudness Meter Peak/RMS/LUFS which ships with Reaper.
Reaper will give you all this information when you export your file as well; in fact, you can even “Dry-Run Render” to get the stats fast without creating a file that you might need to delete because your episode is still too quiet and you need to change some settings.
Getting -30LUFS-I Up to -16LUFS-I: Amplify and Normalize
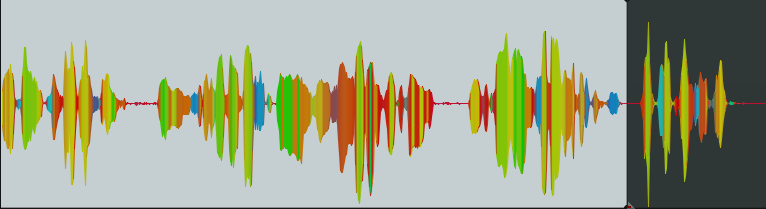
Let’s start with a waveform:
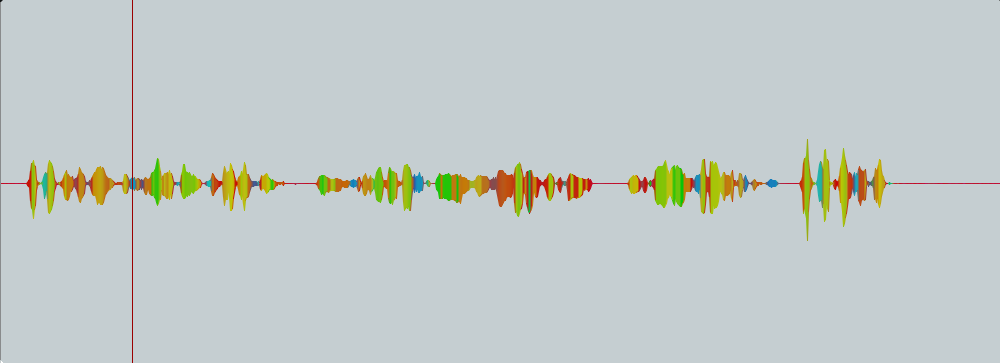
Transcript for "Waveform" audio file (this is the same for all files labeled "Waveform"), Brad speaking: Mic check, one, two, three. This is an audio file to get a waveform! I am sitting at my desk on a Zoom dynamic microphone. There is a car alarm somewhere in the distance. Mic check, one, two, three.
audio-player-details^^^^^Waveform^^^^^https://insights.adswizz.com/hubfs/simplecast-files/blog/audio/Oversimplified%20Guide%20to%20Loudness/Waveform.wav
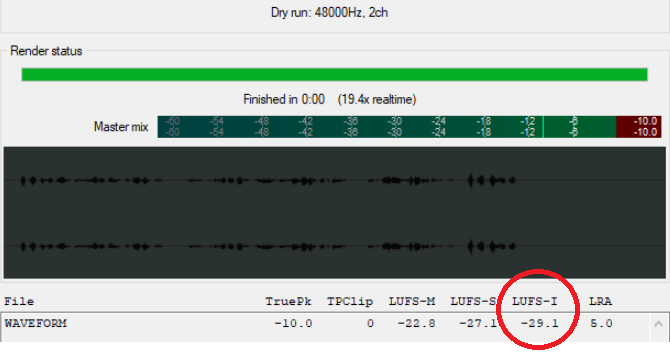
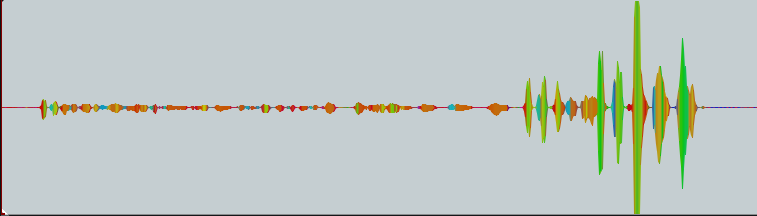
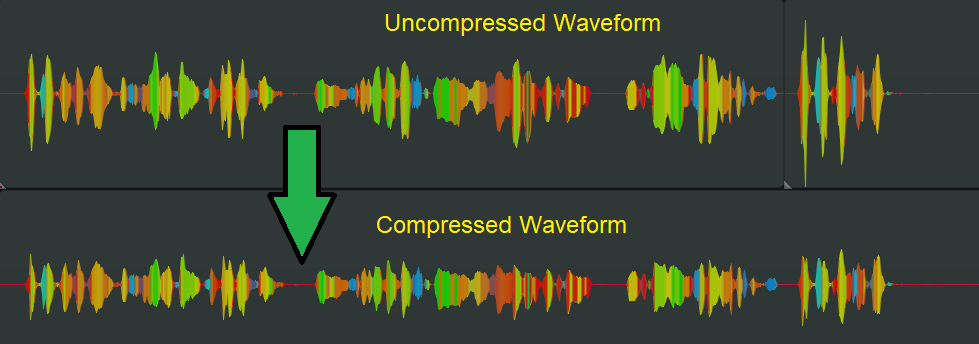
This file clocks in at -29LUFS-I, which is where a lot of quiet podcasts sit. When something’s this quiet for the whole file, there’s an easy solution: Amplify or normalize it!
audio-player-details^^^^^Waveform: AMPED^^^^^https://insights.adswizz.com/hubfs/simplecast-files/blog/audio/Oversimplified%20Guide%20to%20Loudness/WaveformAMPED.wav
Amplifying is simply raising the volume of the audio by a specified number of decibels. Normalization amplifies the audio so that the loudest part reaches a specific -dBFS level. In this example, I’ve normalized to a maximum of -1dBFS.
This file only comes in at -19LUFS-I though. It’s still too quiet.
The obvious answer? “Most of the file is quieter than the last bit, so just boost the first part!”
audio-player-details^^^^^Waveform: Split Amp^^^^^https://insights.adswizz.com/hubfs/simplecast-files/blog/audio/Oversimplified%20Guide%20to%20Loudness/WaveformSplitAmp.wav
Great! That’s better, it’s at -17LUFS-I, which is typically going to be an acceptable level unless you’re working with a company that has strict loudness standards. But while that works for this particular waveform, what about this one?
audio-player-details^^^^^Waveform 2: Dynamic^^^^^https://insights.adswizz.com/hubfs/simplecast-files/blog/audio/Oversimplified%20Guide%20to%20Loudness/WaveformDynamic.wav
Or this one, which is an hour long?

Manually changing the volume works for a line or two that’s louder or quieter than the rest, but when that’s every other line? On a file that’s many hours long? You need something a lot faster.
Enter compressors.
The Magic of Compressors
Compressors work by taming the peaks in your waveform and reducing dynamic range, or how much louder the loud parts can be than the quiet parts. There’s several settings that add flavor to sound (which is a deep and fascinating rabbit hole), but for loudness we’re just going to focus on three:
1) Threshold, the level the compressor starts working at,
2) Ratio, how hard the compressor works,
3) Makeup (gain), how much amplification is applied after compression.
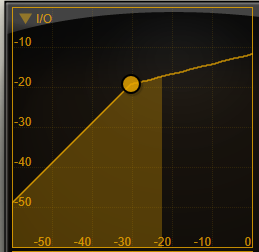
You’ll have an interface that looks something like this under the hood, though many compressors are just a bunch of knobs and assume you know how this works. I’m using a compressor from ToneBoosters in these examples
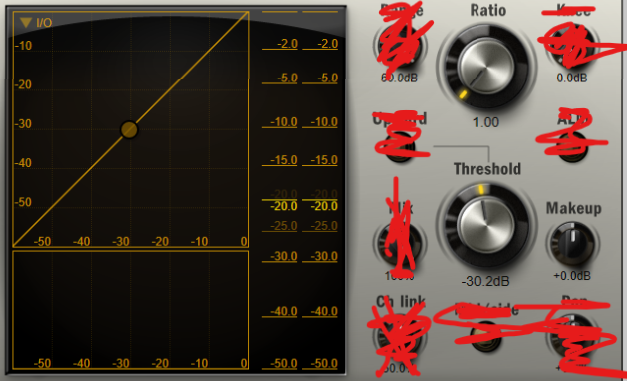
You can ignore all the stuff I’ve crossed out, those are fancier knobs to add flavor.
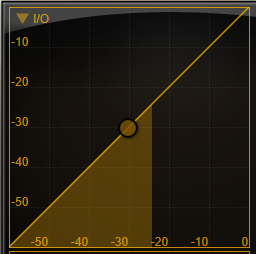
This graph is going to show us how our audio is getting compressed

The x-axis is our incoming signal (audio going into the compressor), and the y-axis our outgoing signal (audio sent from the compressor to wherever you’ve routed it, which will usually be whatever track you’re compressing).
Right now my Threshold is set to -30db, my Ratio is 1:1, and my Makeup gain is zero. Since the ratio is 1:1 and there is no makeup gain, the compressor isn’t actually doing anything.
audio-player-details^^^^^Waveform: Split Amp^^^^^https://insights.adswizz.com/hubfs/simplecast-files/blog/audio/Oversimplified%20Guide%20to%20Loudness/WaveformAMPED.wav
Now let’s turn up the ratio. I’m going to use 4:1 to make this obvious, but 1.5:1 to 3:1 are generally more common and many compressors default to 2:1.

audio-player-details^^^^^Waveform: 4 to 1^^^^^https://insights.adswizz.com/hubfs/simplecast-files/blog/audio/Oversimplified%20Guide%20to%20Loudness/Waveform4to1.wav
Any audio louder than -30dBFS is now reduced: for every 4 decibels louder that it was, it’s now only 1 decibel louder, meaning a peak that was at -26dBFS is now -29dBFS.
But now we have another problem: The whole file is quieter! -22LUFS-I in fact. Now we make the whole thing louder within the compressor using the makeup gain so we don’t have to manually relevel everything. I’m setting the makeup to 11dB in this next file.
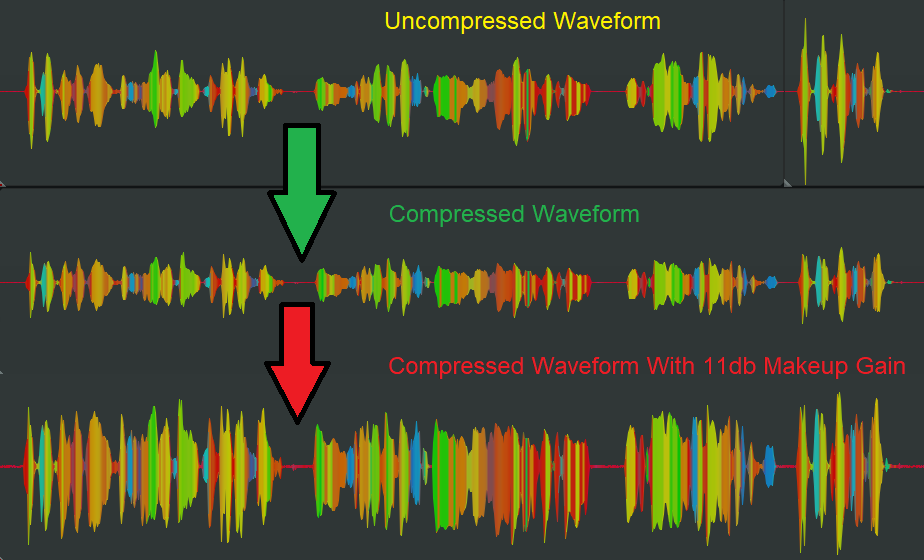
audio-player-details^^^^^Waveform: Makeup + 11^^^^^https://insights.adswizz.com/hubfs/simplecast-files/blog/audio/Oversimplified%20Guide%20to%20Loudness/WaveformMakeup+11.wav
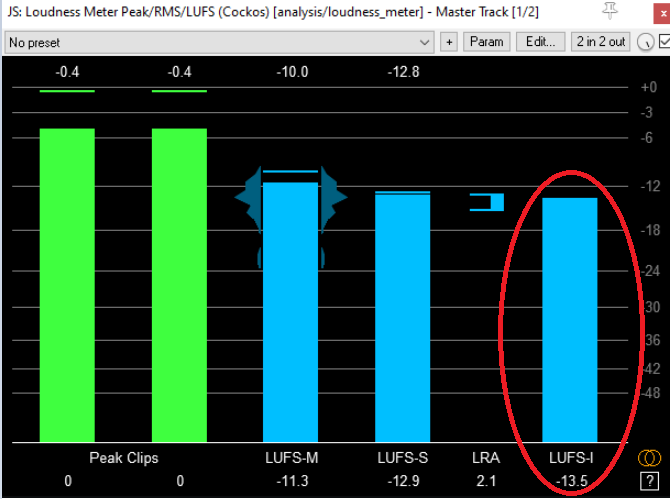
Now everything is louder, but the peaks aren’t so loud that they’re blasting the speakers. This is actually too loud, at -13.4LUFS-I, which is where I usually mix short, intense scenes within a -16LUFS-I file. Your exact threshold, ratio, and makeup settings will depend on the files you use and where in your project the compressor is being used. Your master track FX chain compressor is going to have very different settings from the ones on your dialogue tracks; you may also change your compressor settings at different points in the episode.
There’s lots of different ways to use compressors in your workflow. There’s an overwhelming number of free (and paid (and wildly overpriced)) ones out there, so find one that works for you–it might even be the one built into your DAW. Play around with them a bit before you fork over $100+ to some company with a “magic formula” that makes your file compliant.
Brad Colbroock is a SoCal podcaster and foley artist with a passion for audio drama. They are currently helping to produce upcoming shows for Parazonium Podcasts and The Shadow Network. You can hear Brad's sound design in The Way We Haunt Now, Someone Dies In This Elevator, and SPECTRE.