

A few weeks back, when Rob Arturi popped into the Simplecast Members Forum to say he had built a modular, custom recording booth that also worked for video, and had done it for $2k instead of $20-30k, we sat up and took notice–and immediately asked him how he did it. He was kind enough to give us the step-by-step. Have you built your own DIY studio?
If you plan to take podcasting seriously, you need a good, consistent place to record your episodes. After some noisy occupants of our office building repeatedly, albeit unintentionally, interrupted podcast interviews, I had to make a change. I’d seen voiceover booths online and in the local music shop. They looked perfect, but there were a few issues to contend with.
In addition to podcasting, I planned to use the same sound booth to record video, which meant that not only would I need a space for a podcast desk with room for multiple guests, but that I'd need enough room for the camera and lighting. The commercially-available solutions are quite nice and work quite well, but what I needed would end up costing between twenty and thirty thousand dollars. Everyone hopes, and maybe even believes, that their podcast will be a resounding commercial success but regardless, that’s a lot of money to fork out in the early stages!
I was left with one option: build my own recording booth.
This project was a lot of fun and it's nice having something custom tailored to my needs for a tiny fraction of the cost of a commercially-available option. I consider myself somewhat handy but this project didn’t require a ton of skill or experience. It also didn’t require a lot of special tools. I used a miter saw and table saw for most of the cuts. I used a jigsaw for the duct holes and a cordless drill to attach the framing pieces. One indispensable item was a pneumatic staple gun and small air compressor. I also used a pneumatic brad nailer for the furring strips but it isn’t necessary. I have a lot of tools but I don’t spend a lot on them because I don’t use them often. I bought my pneumatic stapler online for around $20.00 and it worked fantastic. My compressor was a whopping $59.00 from a local discount tool store and it hasn’t let me down after six years of use, so you don’t need a workshop full of tools to build something like this! [Ed. note: You can also rent these at your local home improvement store if, like me, you live in a tiny apartment with no storage space.] I designed my booth to be constructed with as little cutting as possible so I could save time, and you can do the same. If you aren’t comfortable with electrical wiring, skip it. Simply run an extension cord into your booth and make sure to insulate the hole well and you will be fine.
Getting started
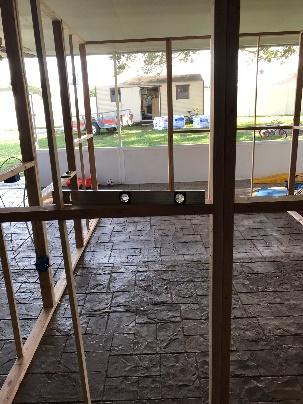
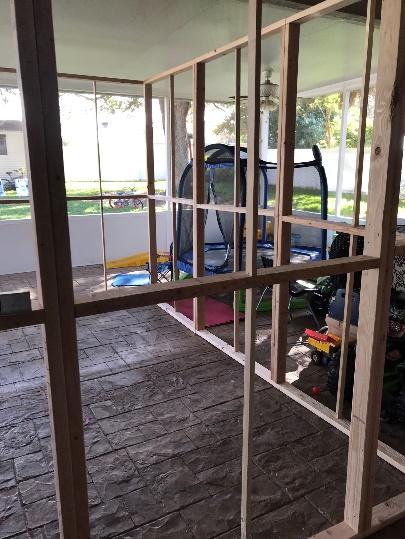
After measuring my available office space and procuring some graph paper from the store, I started to put my idea onto paper. I knew I wanted something modular, so that it could be built in one place (in this case, my house) and then transported to my office building where it could be reassembled. Even if our office building neighbors didn’t mind the incessant power tool sounds, there was insufficient space for the materials and to assemble the booth itself.
I decided to construct the wall panels using a 2x4 frame with overall dimensions of eight feet tall and four feet wide. The booth would be rectangular, twelve feet in length and ten feet in width. This meant a total of ten 4x8 foot wall panels, three for both sides and two for the front and back, plus a smaller eight foot by two-foot version of the same style panel.
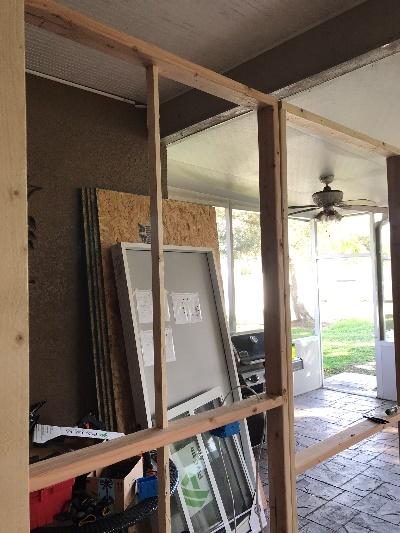
The roof would consist of three 4x10 panels that would sit atop the walls. One of the wall panels would contain a pre-hung exterior door and another panel would have a small double paned window in the event I wanted to sell the booth– if a potential buyer wanted to set up a control room, of sorts, the window would prove handy. (Additionally, I felt comfortable knowing that should I somehow get locked inside and no one would hear calls for help on account of the acoustic insulation, it would be nice to have some other way out!)
During the design process, I had to make some minor revisions to accommodate the building materials available at my local home improvement store. Most recording booths make use of mineral wool insulation but its far more expensive and only marginally more effective. I settled on standard fiberglass R-13 insulation batts that were twenty-three inches wide. The problem was, my design had each wall panel consisting of a wooden frame with two four foot by four foot squares on top of one another. This left two large areas needing insulation but no way to attach the insulation batts. Standard insulation is made to fit into either sixteen or twenty-four inch stud widths in most residential construction with small tabs on either side that can be stapled onto the studs to hold it in place. I thought about adding another vertical 2x4 but these panels were already shaping up to be heavy enough–the last thing they needed was another eight board feet of lumber. I compromised by using lighter–and far cheaper–1x2 furring strips which were brad nailed in the center of each wall panel opening. They didn’t do much for the overall structural support, but they worked great for keeping the insulation in place.
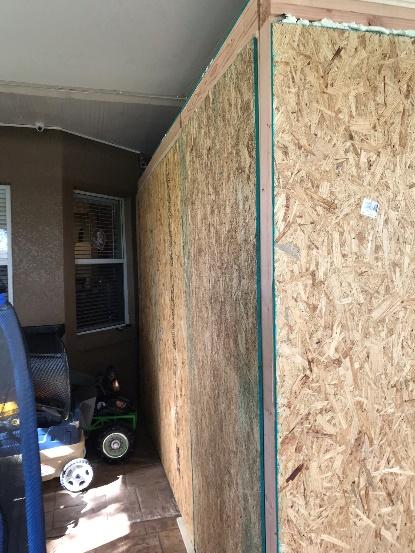
Once the wood frames were completed and the insulation stapled in place, each panel was covered with a 4x8 sheet of OSB plywood. Although it would have been nice to cover the exposed fiberglass with the plywood, I didn’t think the heavyweight paper backing would provide the best acoustics, so the plywood went over the paper backing and the exposed fiberglass would face the inside of the booth. Although it was my intention from the beginning to cover all panels, inside and out, with carpeting, working with insulation is an itchy proposition and I wasn’t confident that the inexpensive outdoor carpeting I’d selected would do an adequate job of keeping the tiny glass particles from being airborne.
Fabric covering
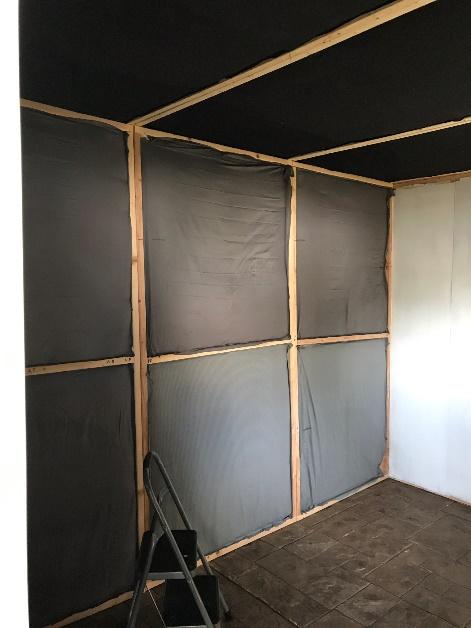
I decided to cover all the fiberglass with fabric but this cost wasn’t in my initial budget of $1300.00. The cheapest fabric I could find at the local big box store was still around $3.50 per square yard and I had a lot of walls to cover. However, that same store sold twin sized flat bed sheets for $4.95, substantially below the raw fabric cost. I used black sheets to cover the inside of the roof panels since they would be visible after final completion. But their stock was limited so some of the other panels were covered in some tacky looking patterns, but since they would ultimately be covered by the carpeting, it didn’t matter. The fabric was attached with staples and to the inner side of the wood frame. This left the joints exposed, which was important for the next steps. The exception to this was the back wall which would be covered with high grade, finished plywood veneer so I would have a smooth, finished surface to use as a green screen for video recording.
Attaching panels
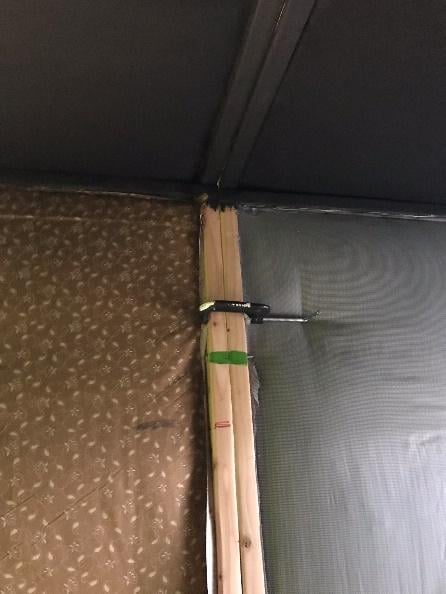
As the frame came together, I attached the panels temporarily using the same construction screws used to assemble the panels. But before completion, I planned to replace these temporary screws with large lag bolts which extended through pre-drilled holes in the abutting sides of each panel. The roof panels were the exception to this rule. Although I waited until the entire structure was complete, including the roof, before pre-drilling the holes so they would match up during the final re-assembly, I knew the roof was the most challenging part to line up, so I decided to just use screws for those panels. And although the majority of the lumber I purchased was good quality, a few boards were badly twisted. This meant that they wouldn’t sit flush when bolted together. A few large c-clamps placed in the affected spots and left overnight solved the problem.
Electricity
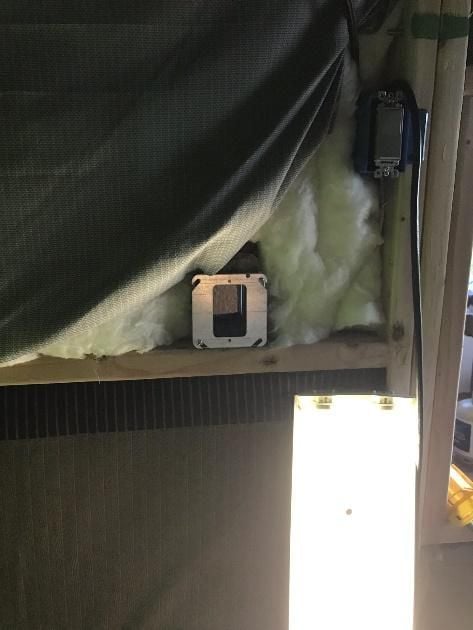
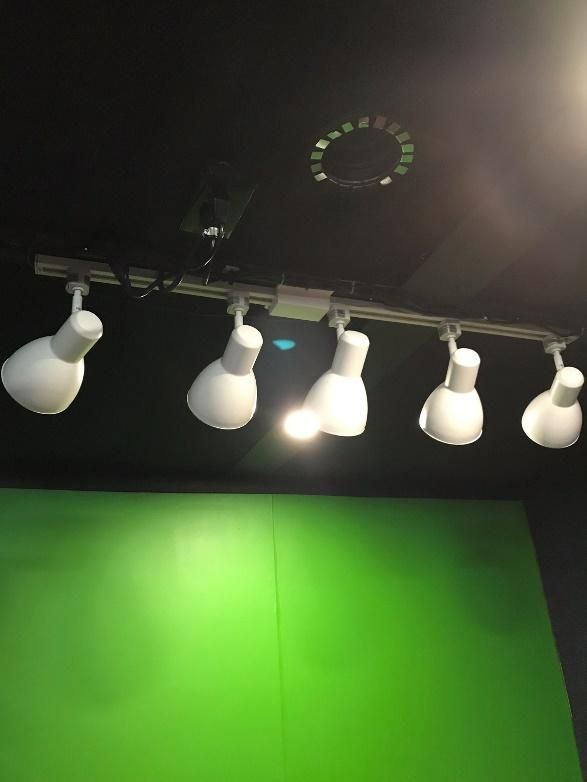
I added several electrical outlets that, rather than being wired to a fuse panel in traditional construction, were wired to a long, heavy gauge extension cord that would simply plug in to an existing outlet in the room. This would not be a good idea if you are planning to plug in a lot of high current devices, but all my lighting was LED and the overall power demand was relatively low.
Carpeting
After that, I cut a five inch round hole in the center of the middle roof panel so that I could attach duct work later. Once the entire structure was completed, I began installing the carpeting to the inside panels. The wall was twelve feet, and I had bought a twelve foot roll of carpeting, so the install was straight forward. I attached each sheet at the top and bottom before cutting along the joint between the panels. The carpeting also had to be left loose on the sides so that I could attach them with the lag bolts later on.
Once each panel was complete, and the location of the lag bolt holes marked with green paint to make final assembly a bit easier, each panel was carpeted on the outside. I could have just used staples to hold the outside carpet in place but I was worried about it eventually sagging and just not fitting right in all areas. Even though this was a DIY project, I wanted it to look professional. I applied outdoor carpet adhesive to the OSB plywood panels before covering each panel with carpeting. I then stapled the carpet around the edges which resulted in clean, uniform appearance.
Transport & assembly
With all the carpeting in place, I transported all the panels to my office for final re-assembly. This step was a bit more challenging than the initial build because there was less room to maneuver and I only had access to two of the four sides. I originally built the room in a large screened porch at my house and was able to access all sides. Since my office has ten foot ceilings, there was just enough room on top to access the air duct and even store some file boxes and assorted junk. After all, my once spacious office was now a bit cramped on account of the giant sound booth now occupying almost half of it.
Sealing & Cooling
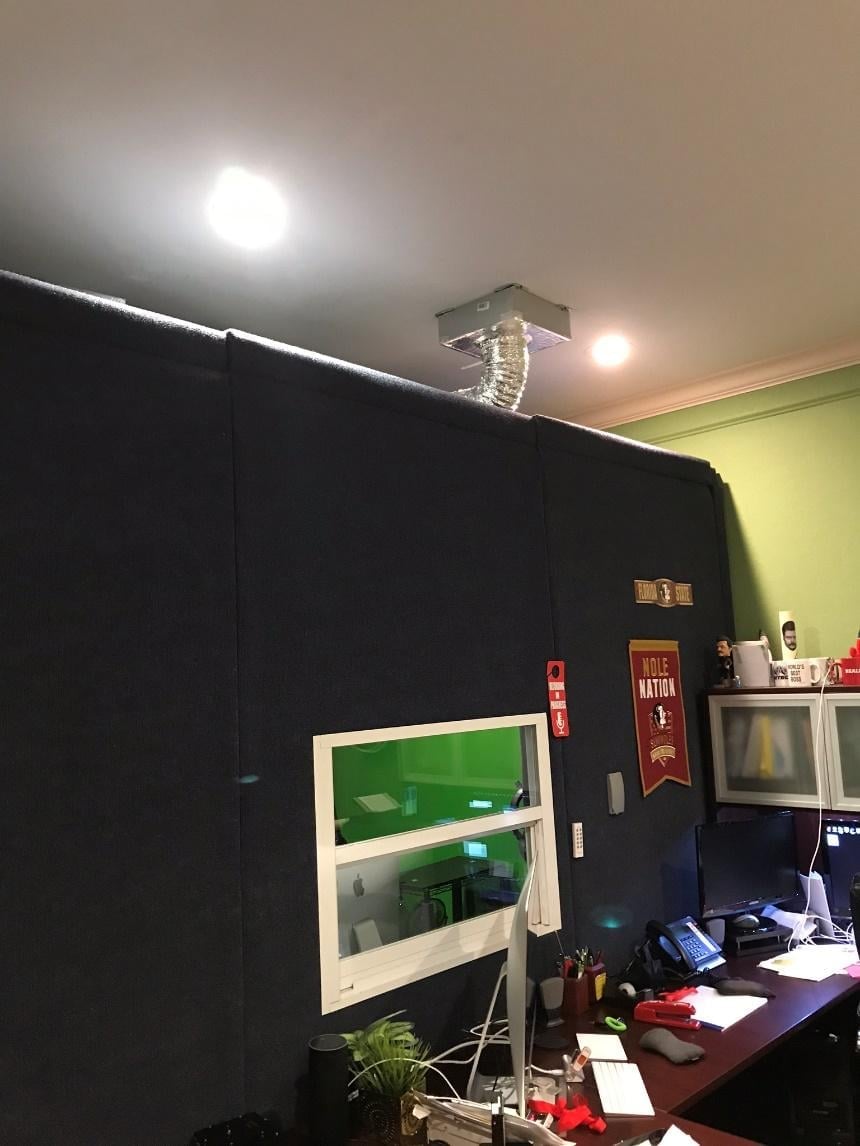
Since sound travels through openings the same way air does, having the room sealed well was important. But if it was sealed too well, it would be difficult to get air inside the room for cooling. This meant I needed another hole for air to find it’s way out. To mitigate sound, I installed a six foot section of duct to the vent in the hope of reducing ambient sounds from finding their way inside. The first central air duct was connected to another length of flexible duct which was then attached to a small in-line boost fan. My thought was that I could simply blow in air from my air conditioned office using this fan. Unfortunately, it didn’t work as planned. The fan, advertised as “whisper quiet” hardly lived up to its name. In addition, it was barely capable of handling the almost one thousand cubic feet of space inside the booth.

Plan B was to use the existing air conditioning system to cool the room. My office has two large air ducts that blow a significant volume of air. After removing the metal register from one of the room vents, and a quick trip to the home improvement store, I attached a fiberglass register box directly to the vent. I used adhesive weather stripping to ensure a good seal between the register box in the ceiling and the one I attached below. I installed a six inch collar to the new register box and connected it to the duct in the roof of the sound booth. The result was a drastic increase in air volume into the booth and a virtually silent air duct at the same time.
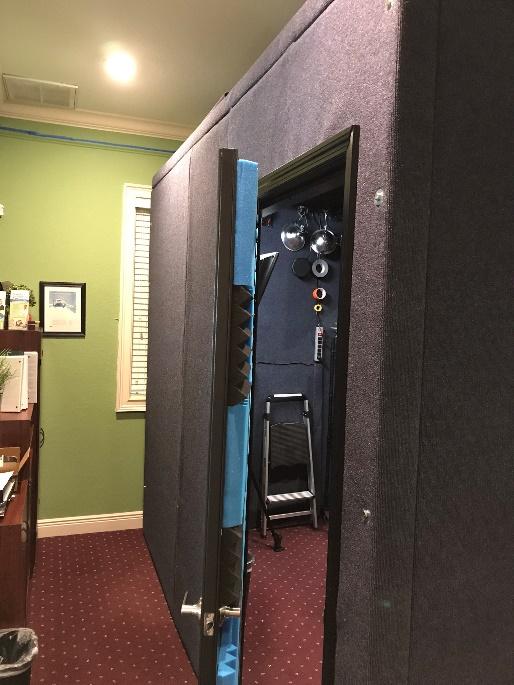
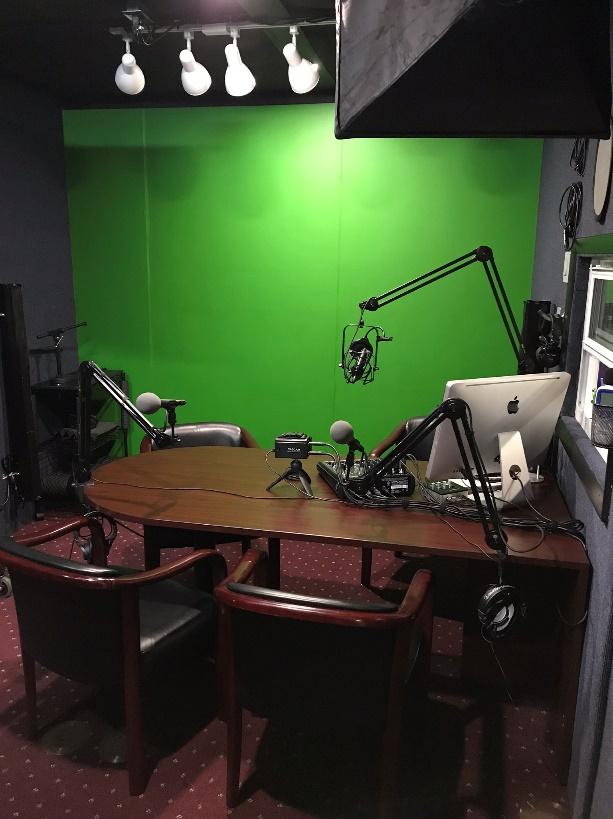
Once all the lighting was installed and some final trip pieces attached, I was able to set up the booth for audio and video production. The acoustics in the booth were fantastic–no noticeable reverb inside the room, even with the one untreated green screen wall. More importantly, the room totally blocked any ambient noise from the office building with an overall nose floor of -40dB, even with the air conditioner blowing. The inside of the metal exterior door was covered with acoustic foam squares as a precaution as it was the only other flat, hard surface and it was opposite the green screen wall.
A quick note about heat
I live in Florida, so air conditioning was of great importance. But if you live in a colder climate and plan to duct a furnace into your sound booth, this can be problematic for several reasons. The first is that it may not be possible (or safe) to use flexible duct to connect to a furnace. Most homes use rigid sheet metal ducts for this sort of heat. The only thing this type of ductwork does better than carrying heat is carrying sound. There are ways to create a baffle to mitigate the sound but it’s complicated so if you can avoid this sort of ducting, I highly recommend doing so for multiple reasons.
Doors & windows
Another tip involves the door and window areas. Framing in these items isn’t as difficult as you might think, especially since the booth only has to keep out sound and not wind, water and extreme outdoor temperatures. If you scan the web for how-to videos on framing, keep in mind that what you need to do is far less complex. But it will, most likely, result in some small gaps around the frame that insulation misses. For this, a few cans of expanding spray foam works wonders. I found a double paned “low E” window for under $100.00, but if you want to save a few bucks, you can skip the window altogether. I would not suggest opting for less expensive single pane glass as it will not be nearly as sound-resistant. The same goes for the door. A metal, pre-hung exterior door cost around $175.00 and I spent a bit more for a thirty-six inch door to make it easier to get equipment in and out.
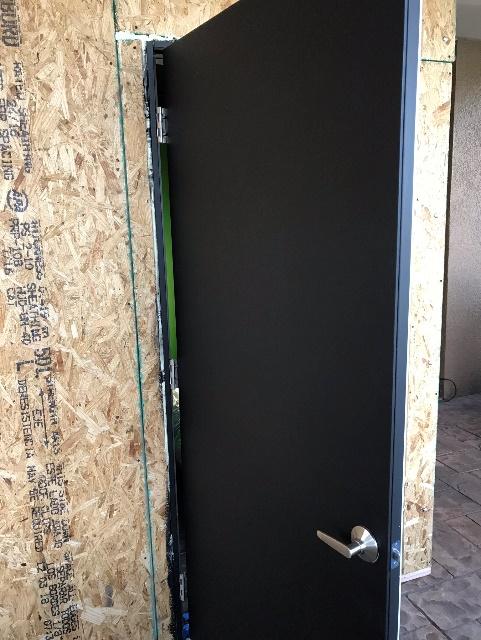
Pre-hung doors are a must unless you are very experienced with framing as they are perfectly constructed for that exact door slab. This means it’s easier to open and close correctly and it seals well. Interior doors do not come with a bottom threshold and they don’t usually include any type of seals. They are also usually hollow and for those reasons, while they are typically less expensive, I would advise against using one. Exterior doors are insulated and have weather seals on all four edges, including the threshold. This keeps the elements out when installed in your home, but it means keeping sound out when used in your sound booth. This is quite possibly one of the most important elements of a good sound booth.
Size
If you don’t need such a large booth, the entire thing can be scaled down to whatever size you need. With ten foot ceilings, I had some room to work with but seven feet might be the max if you need something that will fit in a standard room.
Final Notes
With some basic planning, a little creativity and quality materials, you can build the perfect place to record your podcast–I did!
If you have any questions about my project or you are looking for tips on building one of your own, email me at crankycapitalist@gmail.com and I will be happy to help any way I can. Happy Podcasting!
-Rob Arturi